Do your taps drip no matter how firmly you turn them off? This usually means that they need a new washer, but could also indicate a damaged valve seating.
Replacing the washer
Turn off the water supply, at the stopcock.
Turn your tap on and put in the plug to prevent anything from falling down the plughole.
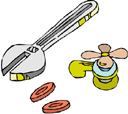
Unscrew the bell-shaped cover of the tap. If this is not easy to do, wrap a cloth around the cover and use a spanner. If the tap has a shrouded head, lever off the top plate, undo the little screw on the top and lift off the handle. This exposes the hexagonal headgear nut.
Use a spanner to undo the headgear nut. If it's stiff, pour a little penetrating oil around the joint, wait 10 minutes and then try again. Keep applying the oil until the joint loosens.
The washer may be in the headgear unit or resting on the valve seating. If there is a small nut holding the washer in place, undo it with a spanner and then prise the washer off. Fit on the new washer. It must be the right size: if you're not sure, take the old one to a hardware shop to measure against a new one.
Grease the threads of the tap and put it back together again. Turn on the tap and then turn on the water supply.
Repairing the valve seating
When you've removed the headgear unit as above, take a look at the base of the tap. If it is rusted or worn, it needs renewing.
Buy a washer-and-seating set. This has a plastic seat which fits over the metal seat of the tap, and a washer-and-jumper unit which fits into the headgear. Reassemble the tap. The tap may drip for a few days because it takes a few days of use for the new seating to settle in place and fit tightly.
For more detailed facts on repairing taps have a look at this site www.leakingtaps.co.uk